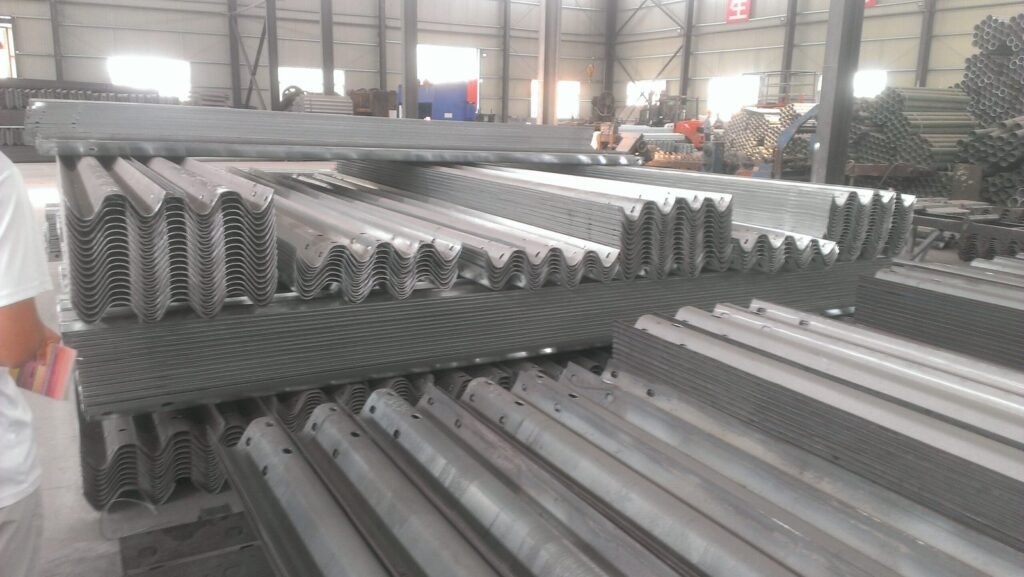
Guardrail
The first and last line of defence on every road — KIDL’s W Beam Guardrail redirects errant vehicles, absorbs impact energy, and saves lives with battle-tested steel engineering designed for Bangladesh’s highways, bridges, and expressways.
Profile Type
W-Section (Double Wave)
Steel Thickness
2.67 mm – 4.0 mm
Panel Length
3.81 m / 4.0 m
Coating
Hot-dip Galvanized Z275
Standard
AASHTO M180 / EN 1317 / BS
Overview
KIDL supplies complete W Beam Guardrail systems including beams, spacer blocks, posts, end terminals, and all connecting hardware — engineered and tested to AASHTO M180 and EN 1317 crash-test standards. Our beams are cold-roll formed from high-tensile structural steel and hot-dip galvanized to Z275 specification for a minimum 25-year service life even in Bangladesh’s harsh tropical and coastal environments.
From national highways and expressways to bridge parapets, mountain roads, and urban dividers, KIDL’s W Beam Guardrail system provides the certified roadside protection that keeps every journey safer — for drivers, passengers, and communities alike.
Specifications
| Parameter | Detail |
|---|---|
| Beam Profile | W-section (double corrugation) cold-roll formed |
| Steel Grade | S235 / S355 high-tensile structural steel |
| Beam Thickness | 2.67 mm (standard) / 3.0 mm / 4.0 mm (heavy duty) |
| Beam Width | 312 mm |
| Panel Length | 3810 mm (12.5 ft) / 4000 mm |
| Post Type | C-section or I-section steel posts |
| Post Spacing | 1905 mm (standard) / 1270 mm (short radius) |
| Galvanizing Coating | Hot-dip galvanized Z275 (275 g/m² zinc) |
| Containment Level | N2 / H1 / H2 (EN 1317) — Test Level TL-2 / TL-3 (MASH) |
| Standards | AASHTO M180, EN 1317-2, BS EN ISO 1461, BNBC |
Applications
- National Highways & Expressways
- Bridge Parapet Barriers
- Central Median Dividers
- Hill Road & Curve Protection
- Flyover & Elevated Roads
- Toll Plaza & Entry Zones
- Industrial Zone Perimeters
- Urban Road Safety Barriers
Advantages
Installation
1. Setting Out & Post Marking
Set out the guardrail alignment with a surveyor’s string line. Mark post positions at the specified spacing — 1905 mm standard, or 1270 mm on tight curves and high-risk zones. Confirm clearance from edge of carriageway and offset from hazard per design drawings.
2. Post Driving
Drive steel C-section or I-section posts vertically into the ground to the specified embedment depth using a hydraulic post driver or drop hammer. Verify plumb and correct height above ground after driving. Avoid over-driving — damaged post tops must be replaced, not bent back.
3. Spacer Block Fitting
Bolt the timber or steel spacer block (blockout) to each post at the correct height. Spacer blocks hold the beam face at the design offset from the post flange, ensuring the barrier deflects correctly under impact without snagging on the post.
4. Beam Panel Installation
Lift W beam panels into position and bolt to spacer blocks using the specified guardrail bolts and washers. Overlap panels in the direction of traffic flow — the upstream panel always laps over the downstream panel to prevent vehicle snagging at joints.
5. End Terminal & Transition Fitting
Install approved crash-cushion end terminals or turned-down earth-burial ends at all barrier terminations. Connect transitions to concrete barriers, bridge parapets, or rigid walls using the specified transition hardware to eliminate stiffness discontinuities.
6. Final Check & Bolt Torquing
Walk the entire barrier run and verify correct beam height, uniform post plumb, panel overlap direction, and bolt torque at every connection. Record post spacing, beam height, and hardware details in the as-built QA log before handing over to the road authority.