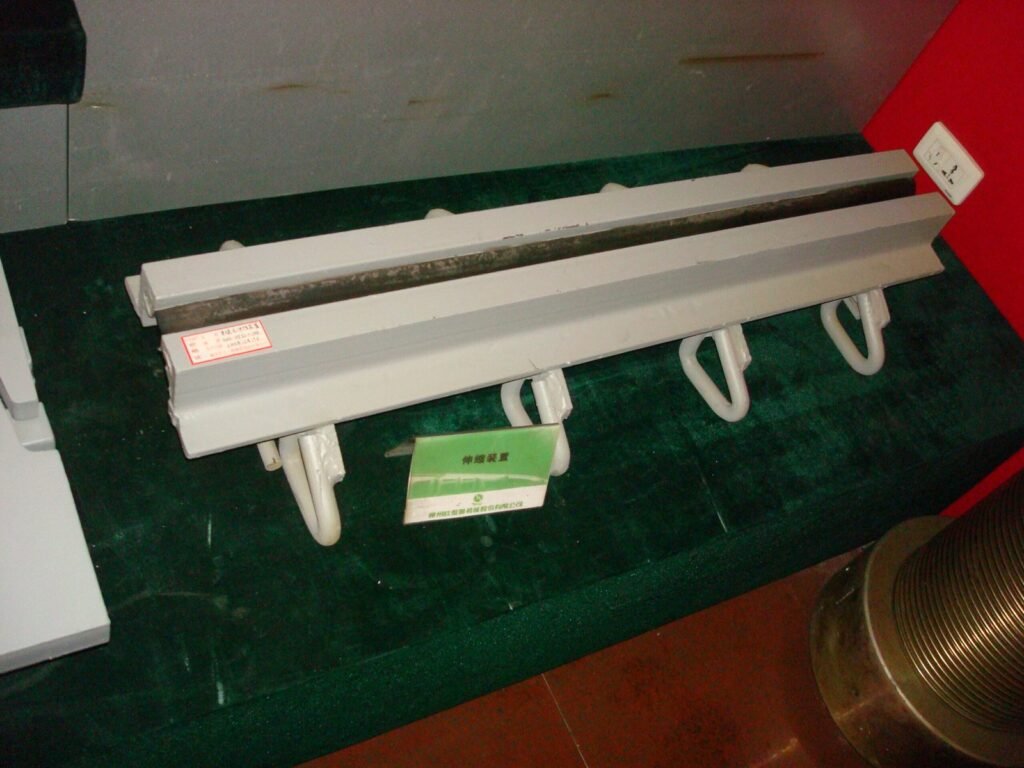
EXPANSION JOINT
Built to move with your structure — not against it. KIDL’s Expansion Joints protect bridges, highways, and buildings from the destructive forces of thermal movement, traffic load, and seismic activity.
Product Type
Strip Seal / Modular / Finger / Rubber
Movement Range
±25 mm – ±500 mm
Material
Structural Steel + EPDM Rubber
Design Life
25 – 50 Years
Standard
AASHTO / BS 5400 / IRC / BNBC
Overview
Expansion Joints are critical structural components engineered to safely absorb movement, vibration, and thermal expansion in bridges, flyovers, highways, and large concrete structures. Without them, uncontrolled movement causes cracking, structural fatigue, and expensive damage over time.
KIDL supplies premium-grade Expansion Joints manufactured to international engineering standards. Our products deliver exceptional load-bearing capacity, fully watertight sealing, and long-term performance under the most demanding traffic and environmental conditions.
From new construction to rehabilitation of aging infrastructure, KIDL’s Expansion Joint systems give engineers the flexibility, reliability, and confidence every major project demands.
Specifications
| Parameter | Detail |
|---|---|
| Joint Types | Strip Seal, Modular, Finger Plate, Rubber Block |
| Movement Range | ±25 mm to ±500 mm (type-dependent) |
| Load Capacity | Up to HS-25 / IRC Class AA |
| Primary Material | Structural Steel, EPDM Rubber, Neoprene |
| Surface Finish | Hot-dip Galvanized / Epoxy Coated |
| Temperature Range | −40°C to +70°C |
| Design Life | 25–50 years with proper maintenance |
| Standards | AASHTO, BS 5400, IRC 83, BNBC |
| Water Tightness | Fully sealed with drainage channel option |
| Anchorage System | Cast-in-place / Retrofittable |
Applications
- Bridges & Flyovers
- High-rise Buildings
- Expressways & Highways
- Railway Bridges
- Tunnels & Underpasses
- Industrial Platforms
- Port & Marine Structures
- Seismic Isolation Systems
Advantages
Installation
1. Surface Preparation
Remove debris, loose concrete, and old joint material. Ensure substrate is clean, level, and free of oil or contaminants. Saw-cut edges must be sharp and straight.
2. Anchor Channel Setting
Position anchor channels or bolts at specified intervals per design drawings. Verify alignment with a surveyor’s level before proceeding.
3. Joint Assembly Placement
Lower the expansion joint assembly into position. Confirm the gap opening matches the design movement allowance for current ambient temperature.
4. Concrete Nosing & Grouting
Pour high-strength nosing concrete (min. C40) or epoxy grout around the anchor zone. Hold joint in correct position during full curing period.
5. Seal Element Insertion
Insert EPDM or neoprene seal profile after nosing concrete reaches minimum strength. Ensure full seating with no voids in the seal contact area.
6. Final Inspection & Testing
Conduct water-tightness test, verify surface flush level, check bolt torque, and complete QA documentation before opening to traffic.